Lately I have had a flood of requests from friends and family (not that I'm complaining - I love it! It keeps me busy), most of them being for fingerless mittens. Although I do enjoy making them, sometimes I find the simplicity of them rather mind-numbing. So, when Mum asked me to make her a pair, I decided to test myself by trying a more complicated pattern. At first I chose Gabriella by Dana Berry, but as soon as I reached the cable chart I realised I was far too tired, or stupid (probably both) to understand it, so I quickly frogged it and had another dig through Ravelry. I then discovered one of the most beautiful patterns I had ever seen on Ravelry, IX Mitts by Rebecca Blair.
Colourwork has always had a soft spot in my heart, in fact a fair isle mug hug was one of the first "proper" projects I ever made when I started knitting (unfortunately I can't find any pictures...), so this project seemed like a lot of fun! My Mum asked for a pair of fingerless mittens because she suffers from arthritis, and as she has to do an awful lot of driving, her hands hurt a lot. I decided to make her a pair of convertible mitts, as this meant she could drive in them, and stay really warm when she's wandering around Plymouth.


I casted them on Sunday, November 22nd, using Sirdar Snuggly 3ply in 303 Cream, which was a really kind gift from my Nana. And boy is it soft! It's probably one of the softest, and coziest yarns I've ever tried! For the contrast colour, I decided to use a skein of Scheepjes Invicta Colour in Cold Fire (957), which I bought from Deramores just a couple of weeks before.
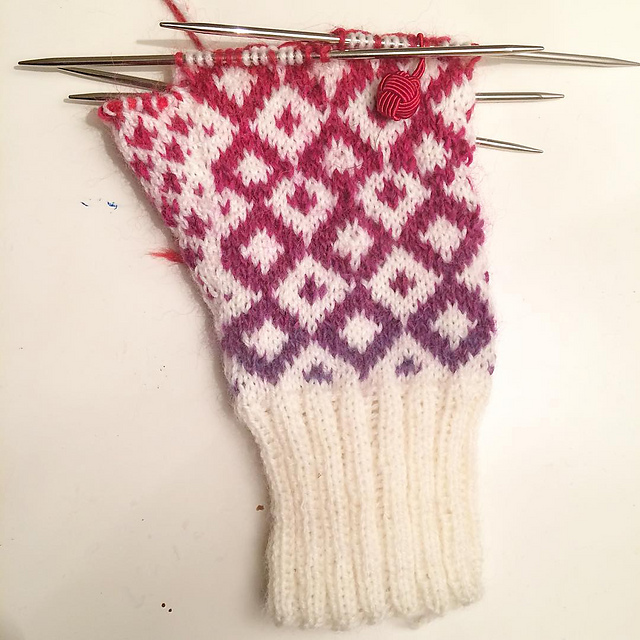
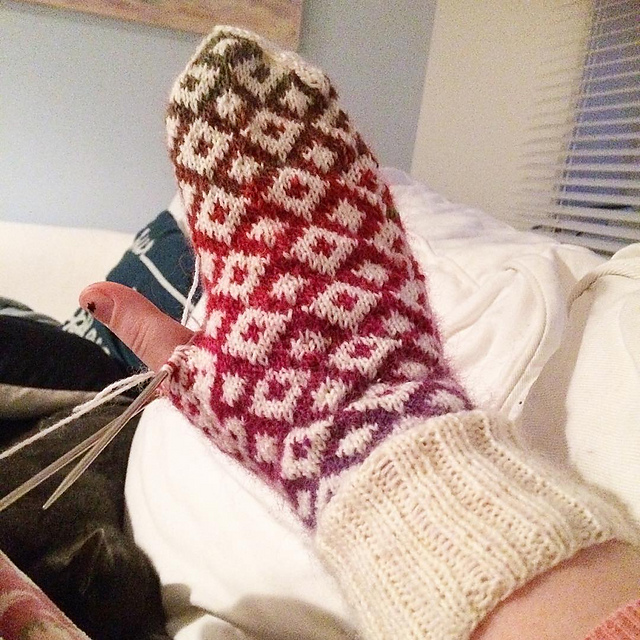
After a few inches of rib, I started on the fair isle pattern. Don't let looks fool you, the actual fair isle chart is very easy to follow. After a few repeats you then begin to work a thumb gusset chart as well, slowly increasing for the thumb while you maintain that lovely pattern. Once you put the thumb onto hold, you work a few more repeats of the main chart before you grab some waste yarn and knit some fake palm stitches. These "fake" stitches will later be pulled out, and you will be left with live stitches which you can then use to create the palm flap.


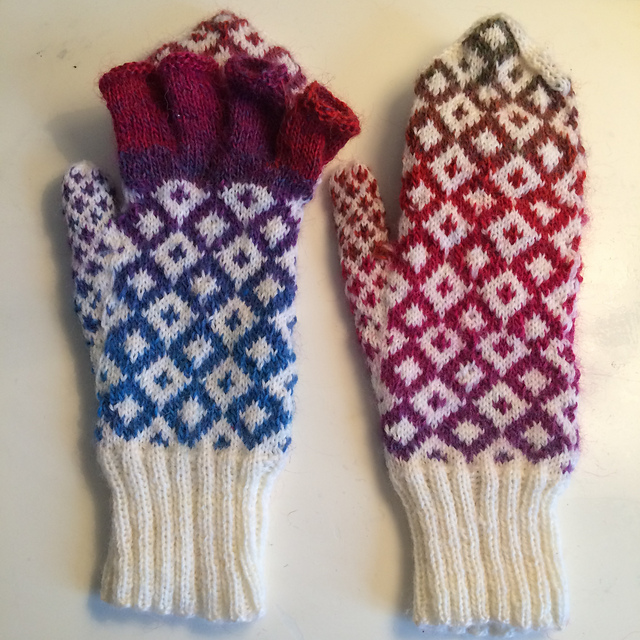
Once you had knitted the fake stitches, you then continue knitting to create the mitten top. After you have casted off, you then move onto the thumb. Fortunately I had remembered to save a few yards of the colour I was using when I put the thumb stitches on hold, this meant that the thumb stayed the same colours. After that, I knitted the palm flap, before finally reaching the last part of the pattern - the fingers. If you wanted just a normal pair of mittens, you could just leave out the fingers and finish knitting the thumb and the palm flap. However, I wanted the full convertible mitten experience, so I set to work on the fiddly fingers.

 Just like I did for the thumb, I saved a few yards of yarn from the colour I was using underneath the fingers, this meant that that same colour flowed from the palm, up through the fingers and then into the mitten top. When I knitted the fake stitches on the palm of the mitt, half of them were used for the palm flap, and the other half were the base for the fingers. I transferred the new live stitches onto my needles, then using the cable cast-on method, I added an extra 29sts. After a couple rounds of simple knit, I had created the foundation for the fingers, and it was time to split the stitches. After putting a bunch of stitches on hold, I slowly made my way round knitting each finger. It was very fiddly, but I managed it!
After a week long hiatus (I had to whip up a pair of mittens for my friend, and I also had a couple of no knitting days), I picked up my project again and knitted the left mitten. I have to say, I am really chuffed with how they turned out!


Once you had knitted the fake stitches, you then continue knitting to create the mitten top. After you have casted off, you then move onto the thumb. Fortunately I had remembered to save a few yards of the colour I was using when I put the thumb stitches on hold, this meant that the thumb stayed the same colours. After that, I knitted the palm flap, before finally reaching the last part of the pattern - the fingers. If you wanted just a normal pair of mittens, you could just leave out the fingers and finish knitting the thumb and the palm flap. However, I wanted the full convertible mitten experience, so I set to work on the fiddly fingers.

 Just like I did for the thumb, I saved a few yards of yarn from the colour I was using underneath the fingers, this meant that that same colour flowed from the palm, up through the fingers and then into the mitten top. When I knitted the fake stitches on the palm of the mitt, half of them were used for the palm flap, and the other half were the base for the fingers. I transferred the new live stitches onto my needles, then using the cable cast-on method, I added an extra 29sts. After a couple rounds of simple knit, I had created the foundation for the fingers, and it was time to split the stitches. After putting a bunch of stitches on hold, I slowly made my way round knitting each finger. It was very fiddly, but I managed it!
After a week long hiatus (I had to whip up a pair of mittens for my friend, and I also had a couple of no knitting days), I picked up my project again and knitted the left mitten. I have to say, I am really chuffed with how they turned out!
Would I knit them again? Probably not in a hurry... but I would definitely like to make myself a pair at some stage! I really love how the yarn pooled, it looks like they were painted (which is a happy coincidence, as my Mum is an artist)! Mum is over the moon with them - hooray!
So, that is what I've been up to since I last wrote you. I do have some more projects to show you, but they'll have to wait 'til later in the week. Until then, take care, and happy knitting!


0 thoughts:
Post a Comment
Thank you for taking the time to comment, I really appreciate it! Hope you have a lovely, yarn filled day :D